
As the sweltering heat of summer approaches, the quest for a comfortable indoor oasis begins. Enter the mini-split air conditioning unit—a compact, efficient solution that promises to keep your home cool without the bulk of traditional systems. Installing a mini-split AC unit might seem like a daunting task best left to the professionals, but fear not! With a little know-how and some handy tools, you can tackle this project yourself. In this step-by-step guide, we will demystify the installation process, breaking it down into manageable tasks that will empower you to transform your home into a refreshing retreat. Whether you’re looking to save on installation costs or simply enjoy the satisfaction of a DIY project, this guide will provide you with everything you need to know for a successful mini-split installation. So, roll up your sleeves, and let’s get started!
Choosing the Right Mini Split AC Unit for Your Space
When selecting a mini split AC unit for your space, it’s essential to assess the size and layout of the area you intend to cool. Start by measuring the square footage of the room; this is crucial in determining the appropriate BTU (British Thermal Units) rating needed for efficient cooling. As a guideline, consider the following:
- 300-500 sq ft: 9,000 – 12,000 BTUs
- 500-1,000 sq ft: 12,000 – 18,000 BTUs
- 1,000-1,500 sq ft: 18,000 – 24,000 BTUs
Another vital factor to consider is the unit’s energy efficiency. Look for models with a high SEER (Seasonal Energy Efficiency Ratio) rating, which indicates better energy performance. Additionally, analyze your specific needs based on elements like the number of windows, insulation quality, and room occupancy. Keeping these components in mind will help streamline your decision-making process and ensure that your selected model provides optimal comfort without straining your energy bills.
| Feature | Importance |
|---|---|
| BTU Rating | Determines cooling capacity for your space |
| SEER Rating | Indicates energy efficiency |
| Noise Level | Impacts comfort and usability |
| Installation Requirements | Can affect overall cost and feasibility |

Essential Tools and Materials for a Successful Installation
To ensure a hassle-free installation of your mini split AC unit, having the right tools and materials at your disposal is crucial. Begin with the basics, which include a cordless drill, a level, and a stud finder. These tools will help you accurately mount the indoor unit and ensure it’s securely anchored to the wall. Additionally, make sure to have a vacuum pump and gauges on hand to assist with the refrigerant lines during setup. These specialized tools are vital for creating and maintaining the system’s vacuum, which prevents contamination and ensures efficient operation.
Next, gather essential materials that will support the installation process. You will need refrigerant lines, insulation, and mounting brackets to secure the outdoor unit in place. Don’t forget to grab connectors, electrical wiring, and sealant for a safe and professional-looking finish. To help visualize the materials required, here’s a simple overview:
| Material | Purpose |
|---|---|
| Refrigerant Lines | Connects indoor and outdoor units |
| Insulation | Prevents energy loss |
| Mounting Brackets | Secures outdoor unit firmly |
| Sealant | Ensures air-tight connections |

Preparing Your Installation Site: Key Considerations
When preparing your installation site for a mini split AC unit, several key factors can significantly impact the efficiency and effectiveness of your system. First and foremost, ensure that the chosen location allows for adequate airflow. Look for unobstructed spaces both inside and outside your home, as any blockages could reduce the system’s performance. Furthermore, consider the proximity to existing electrical connections; an easily accessible power source can simplify installation and reduce costs.
Another important aspect is the leveling of the mounting surface. The wall bracket needs to be not only sturdy but also perfectly level to avoid potential issues with drainage and refrigerant flow. Additionally, take note of the weather conditions in your area. If you’re in a region prone to extreme temperature variations, make sure the unit is installed with adequate insulation and protection from the elements. A thorough evaluation of your installation site can ensure your mini split AC unit operates at its best, providing maximum comfort year-round.
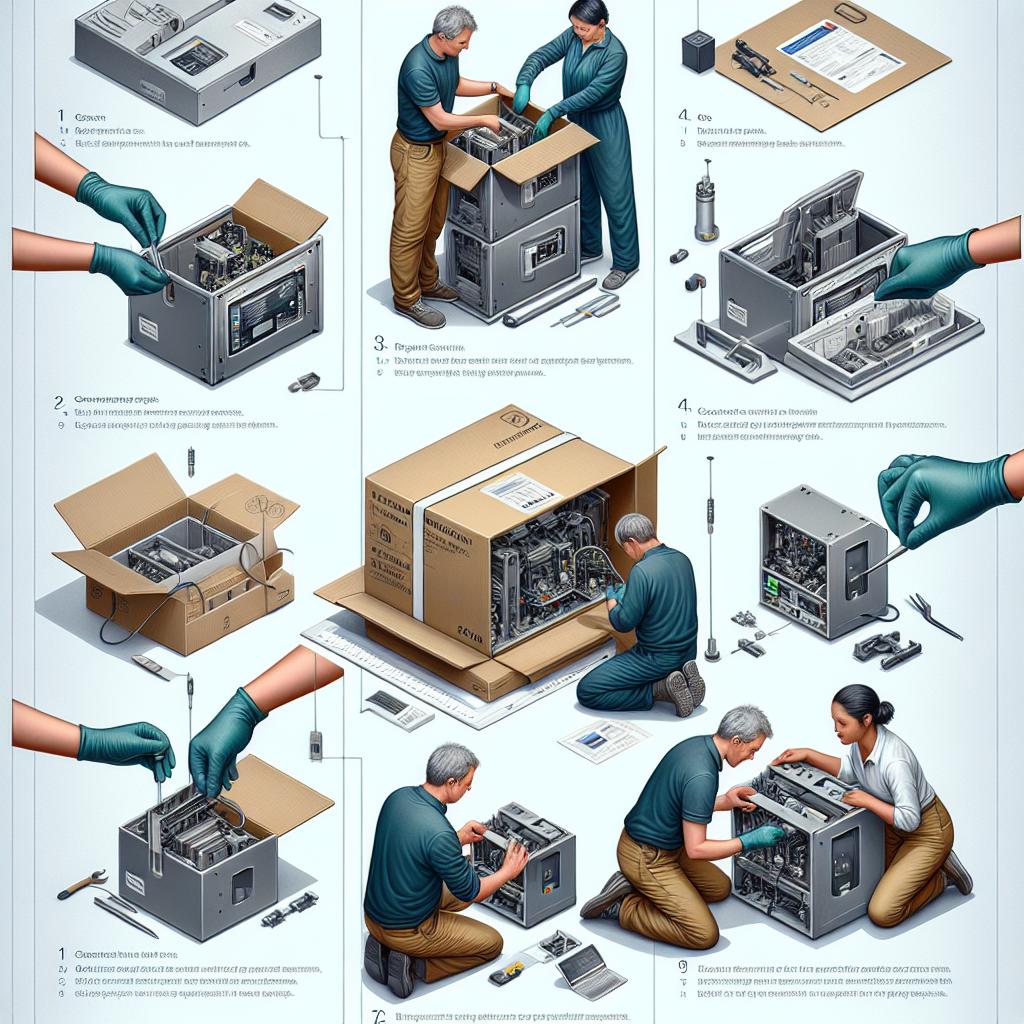
Step-by-Step Installation Process for Optimal Performance
To ensure your mini split AC unit runs efficiently, begin by taking the necessary measurements of the room where the unit will be installed. Choosing the right size is crucial; an oversize unit will cycle on and off too frequently, while an undersized one will struggle to maintain the desired temperature. Next, consider the placement of the indoor and outdoor units. Both should ideally be located in areas that maximize airflow and avoid exposure to direct sunlight, which can affect performance. Once you’ve chosen the locations, you’re ready to move on.
Now that you have the locations mapped out, it’s time to prepare for installation. Gather your tools and materials, which typically include a drill, level, screws, and refrigerant lines. Follow these steps to proceed:
- Mount the indoor unit bracket on the wall.
- Drill a hole for conduit that connects the two units.
- Install the outdoor unit on a stable surface, ensuring proper drainage.
- Connect the refrigerant lines and electrical wiring between the units.
- Seal any openings to prevent air or moisture leaks.
| Tool | Purpose |
|---|---|
| Drill | Create holes for mounting and connections |
| Level | Ensure units are firmly positioned |
| Screws | Secure the indoor unit bracket |
| Refrigerant Lines | Connect indoor and outdoor units |
Q&A
Q&A: Step-by-Step Guide to Installing a Mini Split AC Unit
Q1: What is a mini split AC unit, and why should I consider installing one?
A1: A mini split AC unit is an efficient and versatile air conditioning system comprised of an outdoor compressor and one or more indoor air-handling units. They are ideal for homes without ductwork, offering flexibility in temperature control for individual rooms or zones. Consider them for their energy efficiency, simplicity in installation, and the ability to tailor comfort to your specific needs.
Q2: Do I need professional help to install a mini split AC unit?
A2: While some handy homeowners may tackle the installation themselves, the process involves technical electrical and refrigerant handling, which can be complex and potentially dangerous. Hiring a licensed HVAC professional is often the best choice to ensure safety, efficiency, and the longevity of your system.
Q3: What tools and materials will I need for the installation?
A3: You’ll need a variety of tools including a drill, level, screwdriver, measuring tape, pipe cutter, and wrenches. Installation materials typically include a mini split AC unit kit (with outdoor and indoor components), mounting brackets, refrigerant lines, a PVC drain line, and electrical wiring. Check your unit’s manual for any additional requirements.
Q4: How do I choose the right location for my mini split unit?
A4: When selecting a location, consider factors such as airflow, proximity to power sources, and the outdoor unit’s distance from the indoor unit. Indoor units should be installed high on walls for optimal air distribution and unobstructed by furniture. Outdoor units need a level surface with sufficient clearance for airflow and maintenance access.
Q5: What are the key steps involved in the installation process?
A5: The installation can usually be broken down as follows:
- Mount the indoor unit on the wall bracket.
- Install the outdoor unit in a well-ventilated space.
- Connect the refrigerant lines and drain lines between the indoor and outdoor units.
- Run electrical wiring to power your system.
- Vacuum and charge the system with refrigerant.
- Test the system for functionality and leaks before finishing up.
Q6: How long does it typically take to install a mini split AC unit?
A6: The time required for installation can vary widely. A professional might complete the job in 4 to 8 hours, while a DIY installation could take longer depending on your expertise level and the system’s complexity.
Q7: Are there any common mistakes I should avoid during installation?
A7: Absolutely! Common pitfalls include overlooking local building codes and permits, improperly sealing connections, failing to ensure proper drainage, and neglecting to use the correct amount of refrigerant. Following the guidelines in the manufacturer’s manual and consulting professionals when in doubt can help you avoid these errors.
Q8: What maintenance do I need to perform after installation?
A8: Regular maintenance is key to keeping your mini split running efficiently. This includes cleaning or replacing filters every few months, checking outdoor unit for obstructions, ensuring drain lines are clear, and scheduling professional inspections annually to handle more complex tasks like refrigerant checks and overall system evaluations.
Q9: How can I maximize the efficiency of my mini split AC unit?
A9: To make the most of your mini split system, keep indoor and outdoor units clear of debris, maintain an appropriate temperature setting, utilize programmable thermostats for smart scheduling, and regularly clean filters. Good insulation and strategic shading can also reduce the cooling load on your system.
Q10: Where can I find more resources or assistance for my installation project?
A10: Beyond this guide, numerous resources are available. The manufacturer’s manual is a treasure trove of information. Online forums, video tutorials, and HVAC blogs can offer additional insights. For hands-on assistance, consider reaching out to local HVAC professionals or technicians for personalized advice.
The Way Forward
installing a mini split AC unit can transform your living space into a comfortable oasis, no matter the weather outside. By following the step-by-step guide we’ve outlined, you’ve equipped yourself with the knowledge and confidence needed to tackle this project head-on. From proper measurements to ensuring all connections are secure, every detail plays a crucial role in achieving an efficient and effective cooling system.
As you settle into a cooler, more comfortable home, remember that every good installation comes not just from technical skill, but also from patience and precision. Should you encounter any challenges along the way, don’t hesitate to seek additional resources or expert advice; after all, even the most seasoned DIY enthusiasts occasionally need a helping hand.
Now, take a deep breath, revel in the satisfaction of your hard work, and enjoy the refreshing breeze of your newly installed mini split AC unit. Here’s to a cool, comfortable home for many seasons to come!